
There are so many options for customizing a data export in Oxygen Forensic® Detective that navigating can be overwhelming.
Follow this guide, where we list the numerous possibilities offered in our comprehensive and versatile exporting capabilities.
How to Start an Export
From the extraction home screen, open the Export window by clicking on the third button under the device image.
Investigators have the option to export evidence in the following formats:
- XLS
- XLSX
- XML
- HTML
- RTF
- JSON Project VIC
Alternatively, if the investigator wishes to only export data from a specific section, they can open the Export window using the toolbar within the chosen section of interest. In this case, only data within this section will be included in the report, by default.
Investigators can also export file hashes to txt or csv file formats by selecting the corresponding option from the drop-down Export menu within the Files section.
Customizable Exports
Oxygen Forensic® Detective offers investigators various options for customizing their data exports and reports.
- Filter sections and applications
- Filter categories
- Select file format
- Customize timeframes
- Adjust headers and footers
- Add snapshots
- Export using templates
Filter Sections and Applications
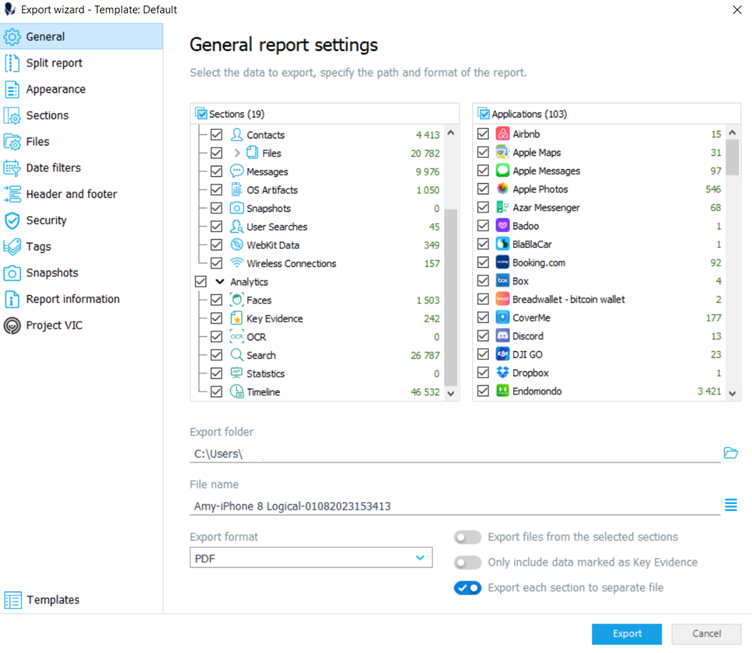
The Export window opens with the General export settings. By default, all categories are included in the report. Investigators can manually select which sections and applications they do not want to export data from.
Use the checkboxes to fine-tune the report. In addition to choosing specific sections to export data from, investigators can export each section to a separate file.
Please note, the latter option is selected by default. This means investigators will have to uncheck this checkbox if they wish to export all sections to the same file.
Finally, select the folder to send the exported data to, name the report, state the file type, and click Export to complete.
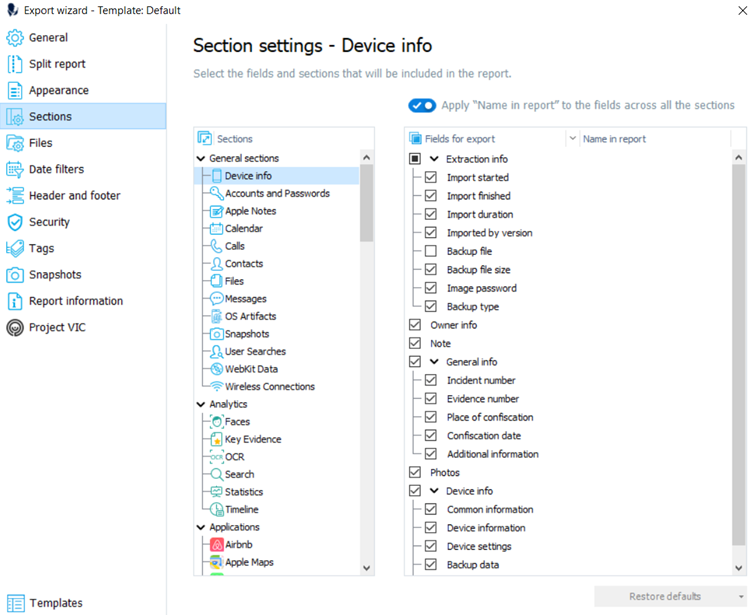
Filter Categories
The Sections tab offers a more detailed approach to filtering the categories that are to be included or excluded from the report. Click on a section of interest to view and edit the list of fields to export. From there, investigators can set the order of fields and sections in accordance with the priorities and needs of their investigation.
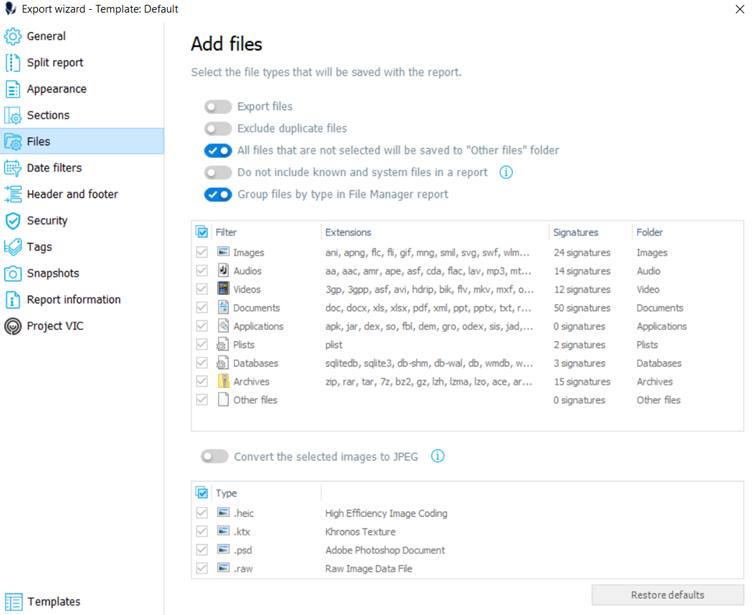
Select file format
File format options are available within the Files tab. Use this section to view and edit the file extensions associated with each category as well as the destination folder for the export.
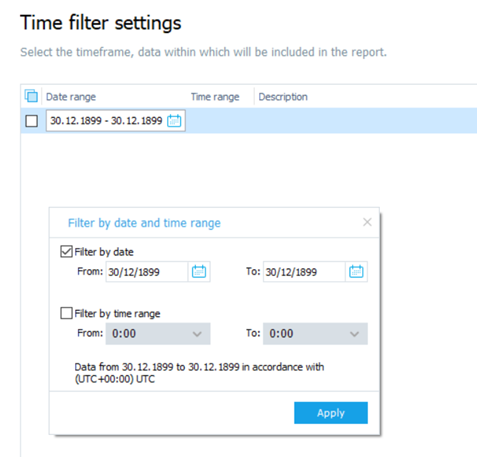
Customize timeframes
If the investigation requires data within a specific timeframe, go to the Date filters tab. There, investigators can state the timeframe of interest manually or by using the calendar.
Adjust headers and footers
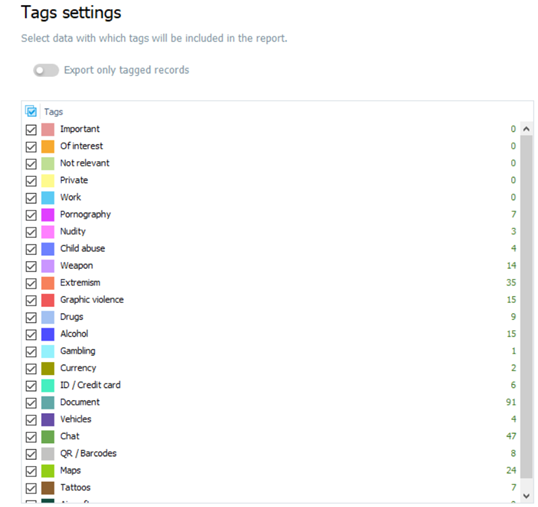
Open the Header and footer tab to edit both main and page headers and footers. If investigators only need to export tagged data or exclude data marked with certain tags, such as Not Relevant, navigate to the Tags tab.
Use the checkboxes to select or exclude any necessary tags.
Add snapshots
In the Snapshots tab, investigators have the option to add snapshots made from the Social Graph, Statistics, or Maps sections to their report.
The snapshots can be exported to a SVG file within HTML and XML reports, allowing the investigator to zoom within the image.
Insert the additional information about the report, such as investigator name, location, agency, company, department, or event type from the Report information tab.
JSON Project VIC settings are available from the Project VIC tab.
Export using templates
At the bottom of the Export window, there is the Templates tab. With export templates, investigators can save their preferred settings to use them again later, instead of adjusting their settings for each export. Investigators also have the option to import saved export settings.
Here’s everything investigators can do:
- Create personalized templates of their preferred export by clicking Add New Template
- Import templates of saved settings as .settings files by clicking on Load
- Save template settings to a file by clicking on Save As (this will be displayed in a grid once the mouse is hovering over the template)
- Edit template descriptions by clicking on the pencil icon
- Delete templates by clicking on the bin icon
- Save current Export settings as default settings by clicking on Save settings
Once the Export settings are customized according to the needs of the investigation, click Export to create the report.