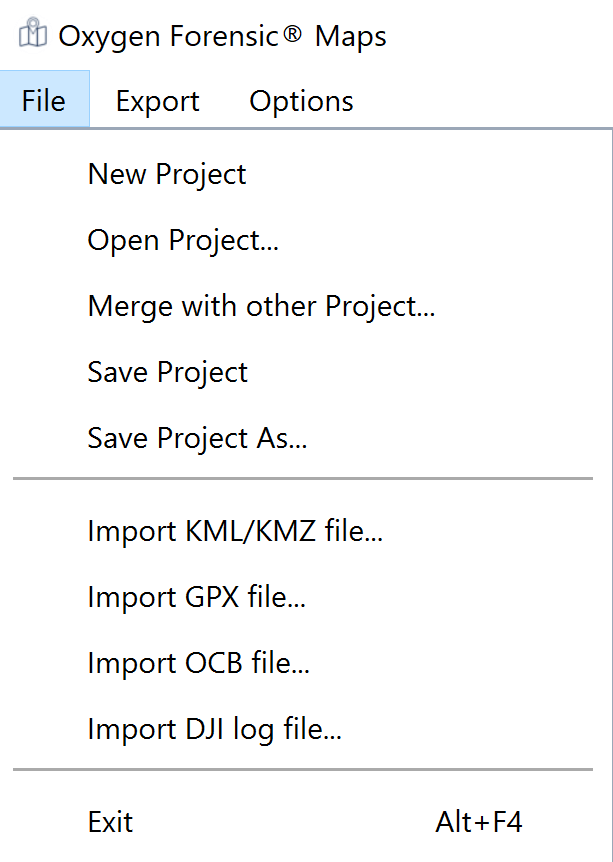
Everything we do leaves a trace, and this is especially true in the digital age. Today, there is more data than ever before to gather evidence from. Whether a drug dealer sends the location of a package, a suspicious drone falls into a protected zone, or an offender drags a body into the forest but records it as a hiking workout – a mobile device will have a record of the location that was visited. This type of evidence can be critical to proving or disproving the whereabouts of a suspect. With Oxygen Forensic® Detective, we can guarantee investigators will have access to all available geodata.
Our sources
Oxygen Forensic® Detective has the ability to extract geodata from various sources, such as applications, clouds, media files, MAC addresses of WiFi points, and drones.
Applications and clouds
Oftentimes, a great deal of geodata is shared by users themselves. They send locations in messengers, add geotags to their posts on social media, record workouts, order food, and use rideshare apps. They even use maps and navigation apps to get around, whether on foot or in a car.
Supporting over 600 apps and 23,200 app versions, Oxygen Forensic® Detective is the industry leader when it comes to parsing data from apps. Data extracted from apps will include shared and saved geolocations.
App data can be backed up onto the cloud. Data generated on a different device can be synchronized to the very same cloud. Thus, we recommend using the built-in Oxygen Forensic® Cloud Extractor to acquire as much data as possible, extracting cloud data as well.
Media files
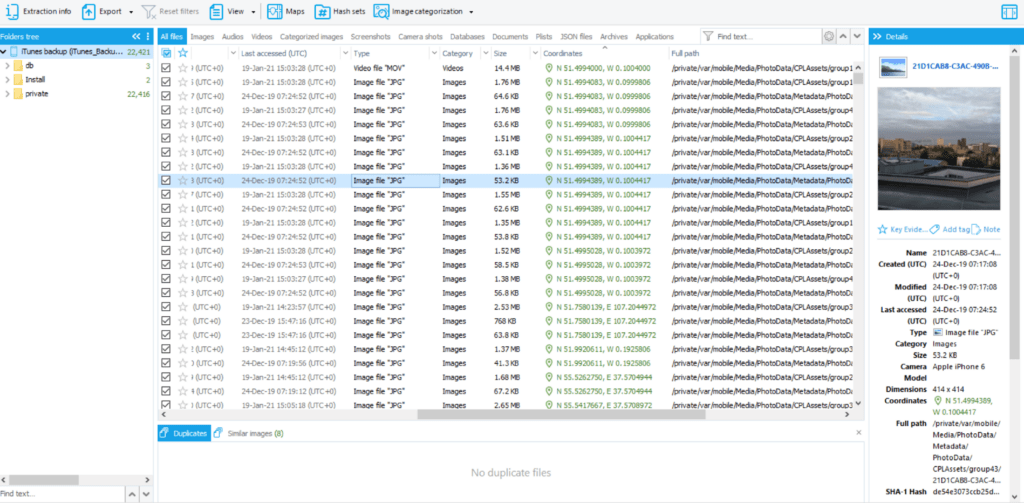
Photos and videos taken by a user often have geotags. Oxygen Forensic® Detective not only extracts files themselves but also information about them, such as geodata.
WiFi points
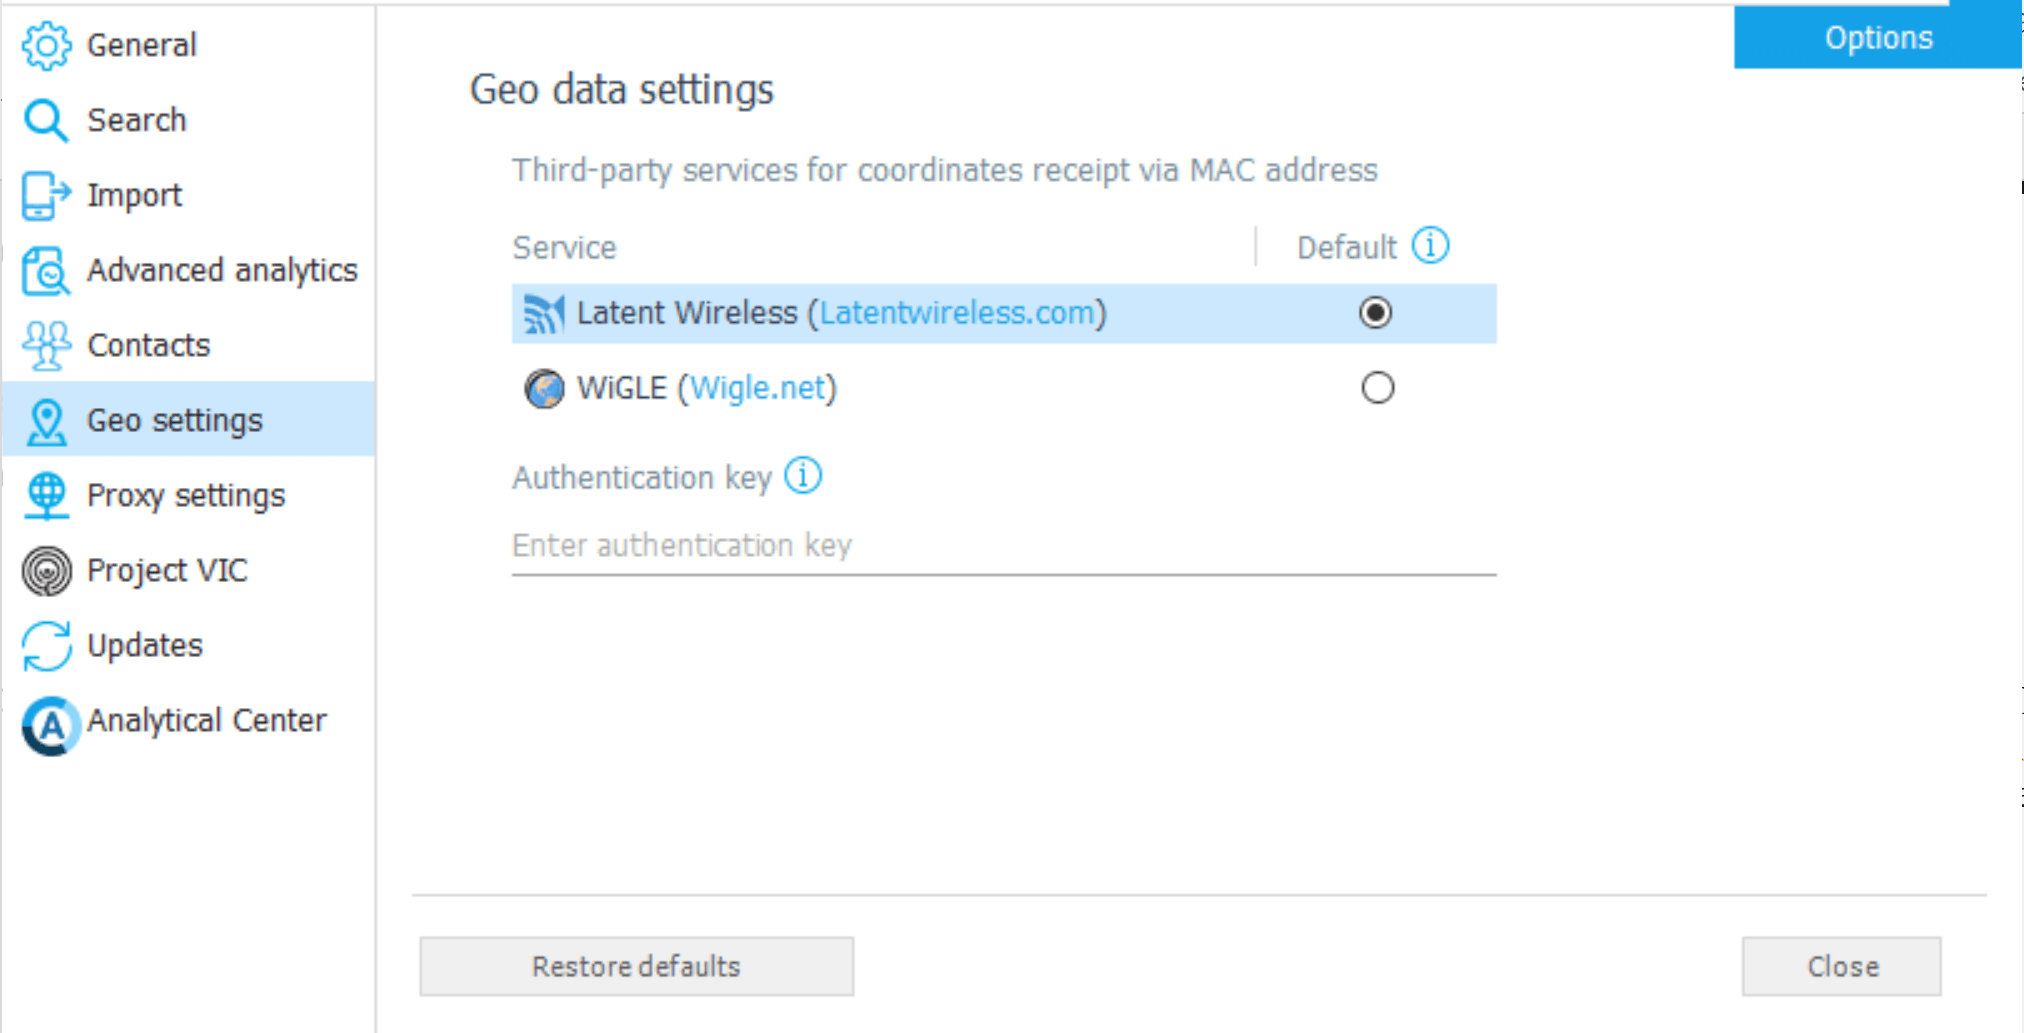
At one point or another, most devices will connect to a WiFi network. Geo-coordinates of WiFi points can also be obtained by Oxygen Forensic® Detective. Third-party services like Latent Wireless and WiGLE are used for acquiring geocoordinates of WiFi access points by their MAC addresses (SSID). However, investigators will need to register to the service and enter their authentication key or token in the geodata settings prior to getting the coordinates of WiFi points.

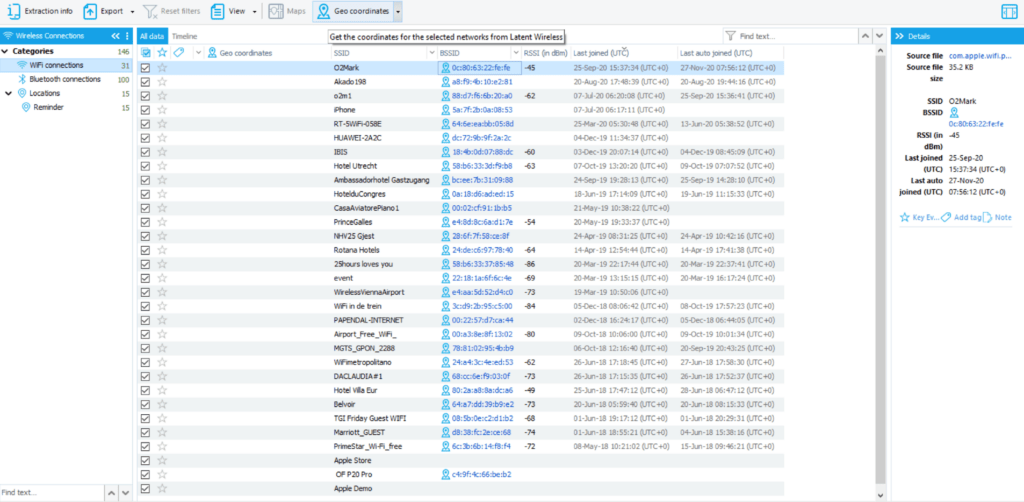
After the key or token is verified, investigators can get geo-coordinates of WiFi points from the “Wireless Connections” section. To do that, select networks of interest and hit the “Geo coordinates” button in the toolbar. Geo-coordinates will be acquired using the default service.
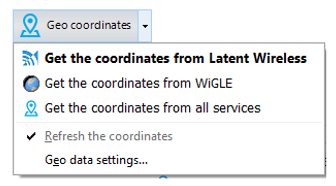
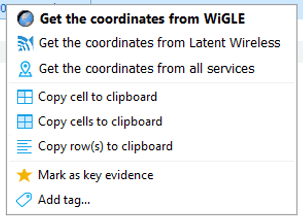
To get geo-coordinates of WiFi networks from all services or one that was not set as default, use the downward arrow next to the button or right-click on the WiFi point of interest. Next, select the desired option from the drop-down list.
Drones
Sometimes drones find themselves in places they are not supposed to be, but where did their flight begin? What was their route? This data will help figure out whether a drone trespassed intentionally or by mistake, as well as what has been recorded. Investigators can import DJI drone logs, DJI GO flight logs, DJI Assistant backups, DJI drone images, Parrot drone logs, and Parrot drone images into Oxygen Forensic® Detective to parse drone data.

Alternatively, having access to the device that was used to control the drone will allow users to acquire data from apps that were used for that purpose. Additionally, DJI Cloud, MyParrot Cloud, and SkyPixel are supported by our Oxygen Forensic® Cloud Extractor, allowing investigators to analyze data from different devices that were synchronized with the same account.
Where to analyze
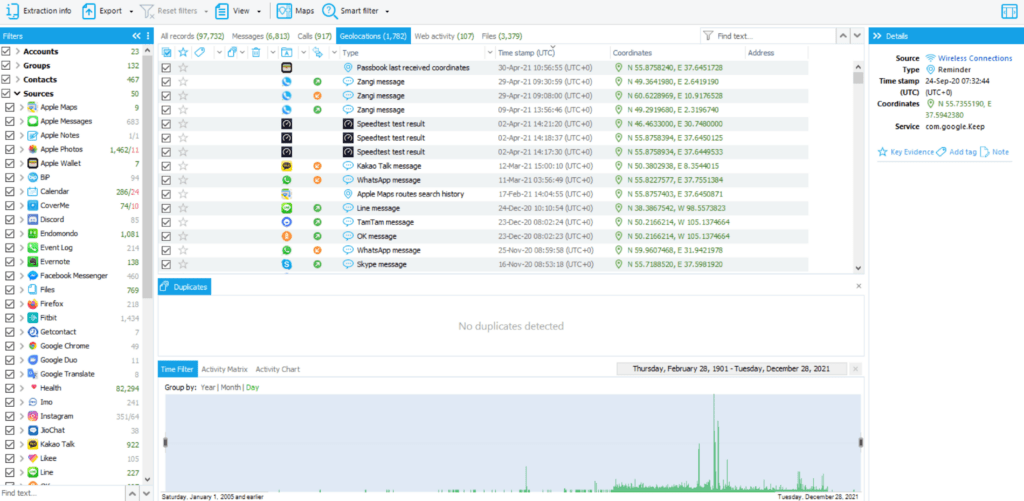
After the data is parsed, investigators can view geo locations in a column of a section of interest or view all available geodata within the Timeline or Maps module.
Sections
If investigators want to review geo coordinates or device information from a specific app, they can open the corresponding section and click on the “Coordinates” column for the entries to become sorted by the presence of geodata.
Timeline
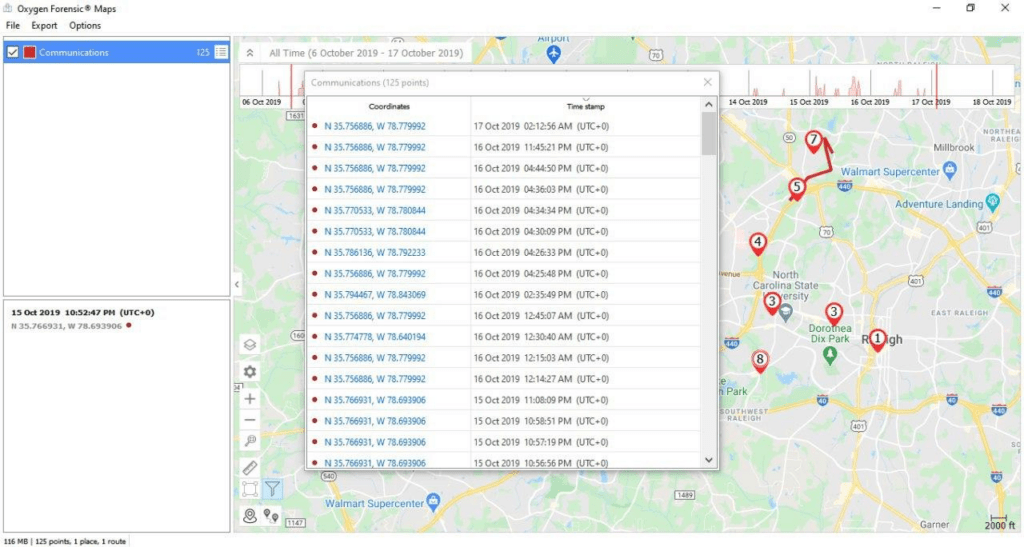
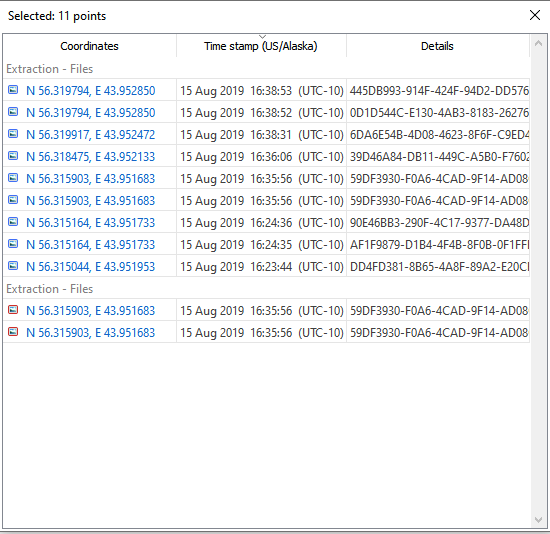
All geotags of all entries are listed in Timeline under the “Geolocations” tab. Click on the entry of interest to view its metadata on the right sidebar. Investigators can filter the grid by data source using the sidebar on the left or filter it by date from the bottom panel.
Maps
All data containing geo-coordinates can be opened in Maps. To access this module, select Maps from the upper toolbar in the section of interest. Whether it is Timeline, Calendar, Notes, Calls, Files, Messages, OS Artifacts, WebKit data, Wireless connections, Applications section, or a specific application, the investigators can. When opened from a specific section, the Maps module will be automatically filtered, showing data from this section.
Investigators can take filtering a few steps further by setting the time frame using the upper panel. They also have the ability to exclude places, route lines, and common locations (all will be shown by default) by clicking on the Settings icon on the left part of the map or filtering data sources on the left sidebar. Zoom in or out on the map to overview the displayed data. Click on an entry of interest to view the information about it in the Details panel on the lower left sidebar.
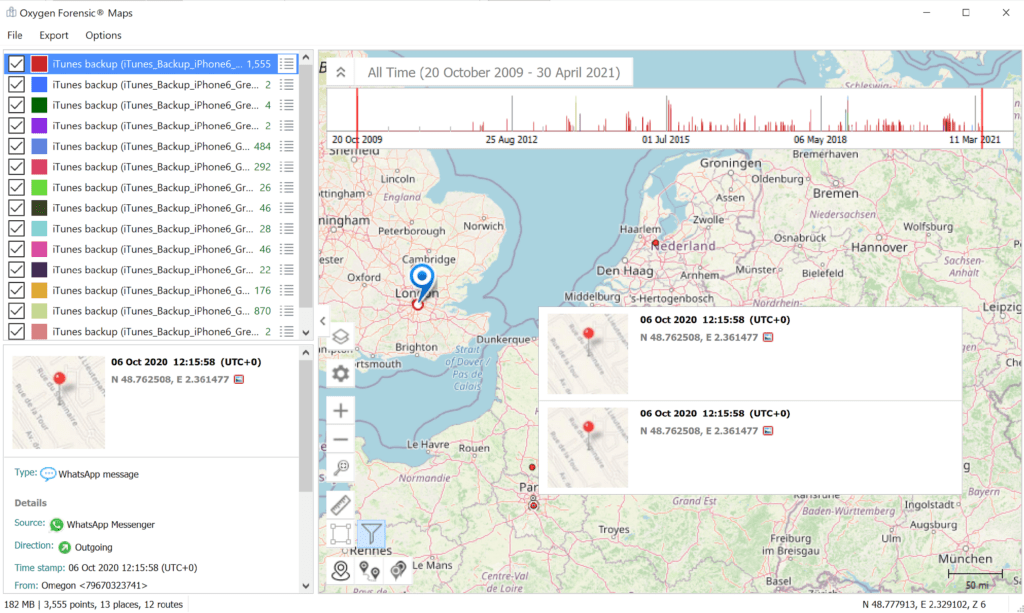
Investigators can also build a map for a case, viewing all geotags from all involved devices at once. To do that, select a case, open its Timeline and then open Maps from the toolbar. The sources of available geolocations, including the devices’ names, will be listed on the left.
Using maps, users can recreate routes and play them at a normal or accelerated speed, tracing the movements of the device.
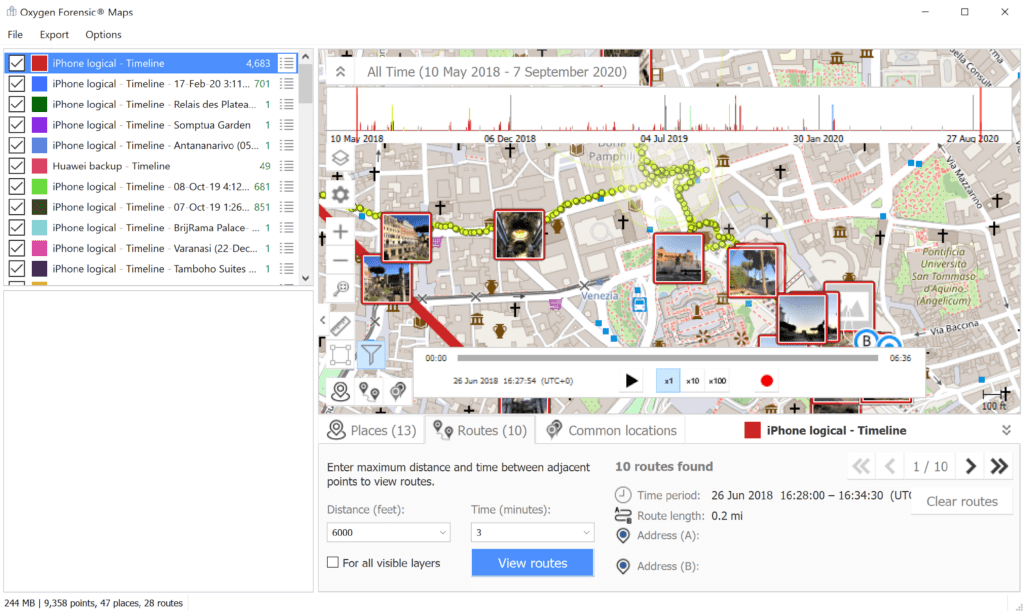
Investigators can search for common locations and review them using the third tab at the bottom of the map by selecting distance and time and then clicking “Identify locations.”

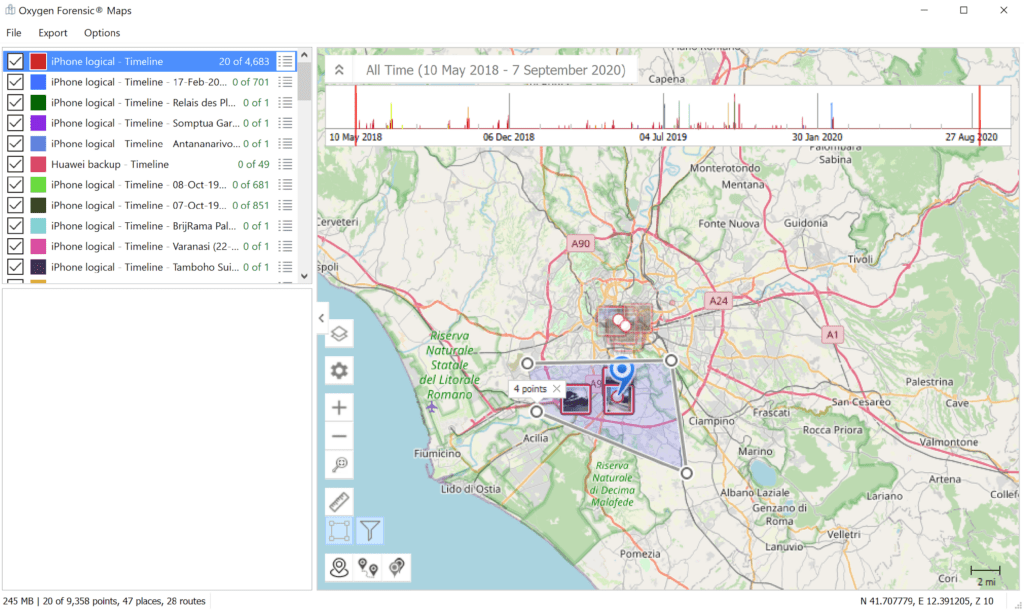
If the case is location-wise, investigators can select an area on the map, within which geo coordinates will be displayed using the square button on the left. Highlight the area of interest using points and then click the filter button. The geo points outside the area will become semi-transparent, allowing investigators to focus on data within the area of interest.
Users can also alter time zones for multiple devices within this section. By analyzing the coordinates specified in the information about the file, the program displays the data on the world map. If the map displays location points from different devices, which also reside in different time zones, the displayed location points will establish a standardized time zone.
Once the software determines a base time zone, the local values are converted to the values of the displayed time zone, which the user can see in the program interface.
Investigators can set the device’s time zone and use it for time values outside of UTC, like EXIF metadata, for example.
To change the displayed time zone for all devices in the interface, click the Options tab. This will prompt a dropdown menu. From there, select Time zone and then Change time zone.
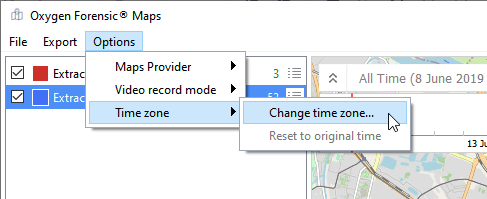
Once Change time zone is selected, the Time zone settings window will launch, allowing the user to change the displayed time zone to the time zone of their choosing. Keep in mind that this setting can be changed as needed, so investigators have the ability to view evidence from as many different time zones as possible throughout the course of a case.
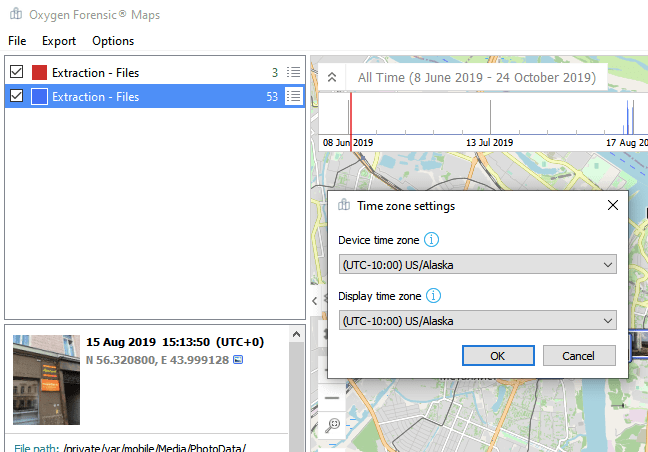
After the chosen time zone is set, the time values for each location point will change accordingly, giving the investigator the ability to view all the evidence and data through the same investigative lens.
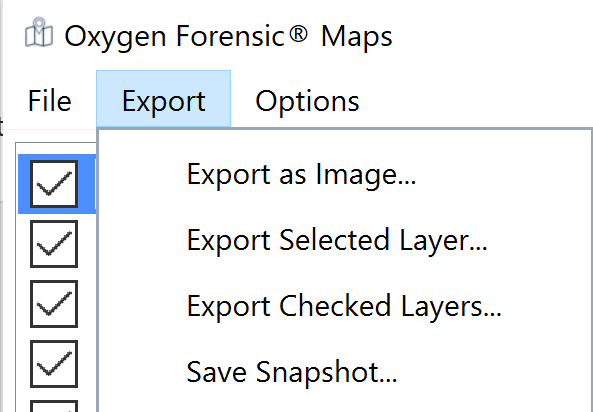
Investigators can save changes upon closing the map. They can also take snapshots of the Maps data, which will be added to the Snapshots section and can later be included in a report or can be exported as a file. Investigators can also import other files containing geo data to a map in order to detect matching locations.
We are confident this blog will serve as a useful resource for anyone looking to leverage geo data in Oxygen Forensic® Detective. If you have questions or feedback, feel free to leave a comment. We’ll get back to you as soon as possible!