
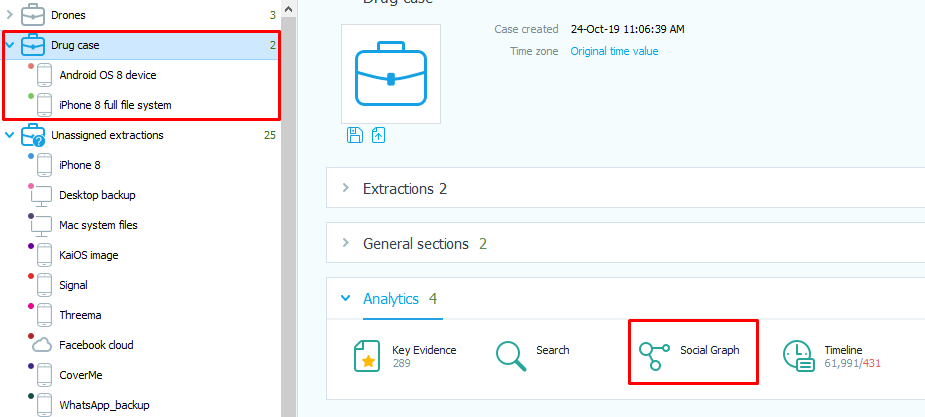
Our Social Graph tool has many uses and discovering them all is a task in and of itself. Here are 10 capabilities all investigators must know to get the most of our Social Graph.
1. View a single device’s communication or multiple device’s communication in one view on the Social Graph. Select a case with several devices to build the Social Graph for all case extractions.
2.Get a comprehensive view of the data by utilizing our different graph modes. You can view:
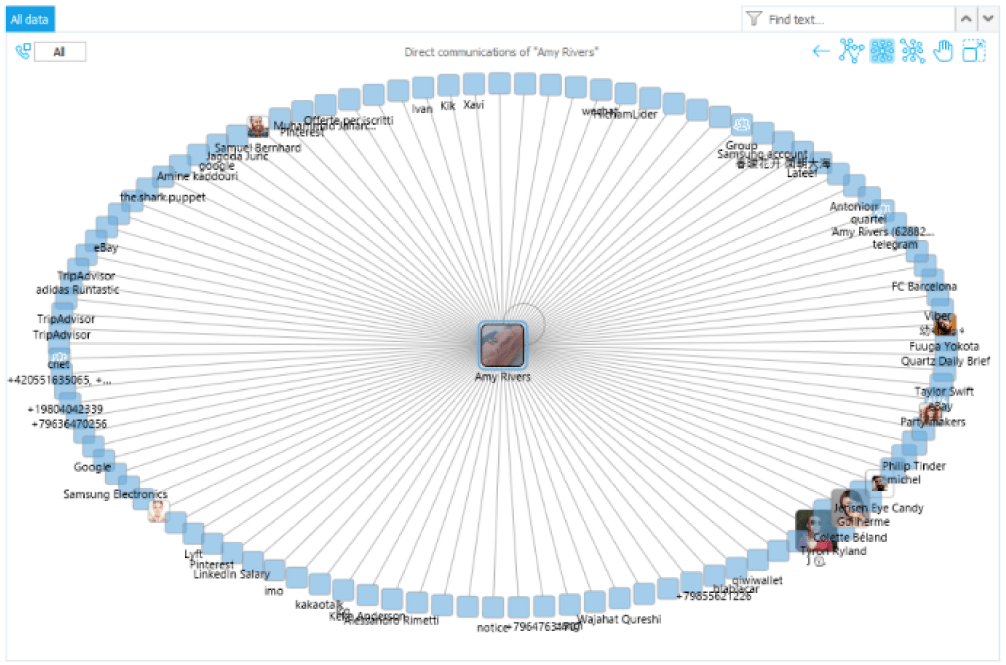
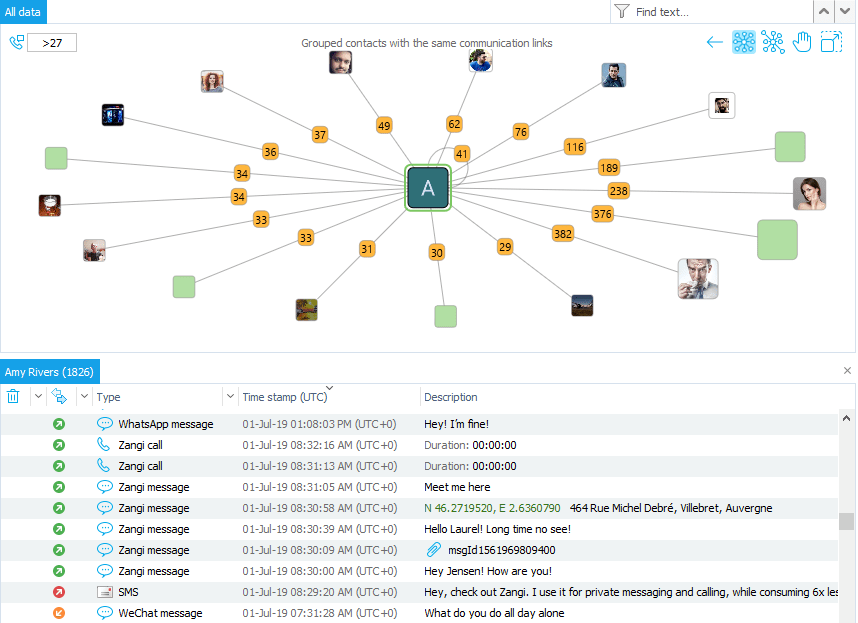
a. any contact’s direct communications – double-click their icon displayed on the graph. View those in the following modes:
i. circle mode, in which all user’s direct communications are shown in a circle built around the account of interest, by clicking on circle view icon in the upper right corner;
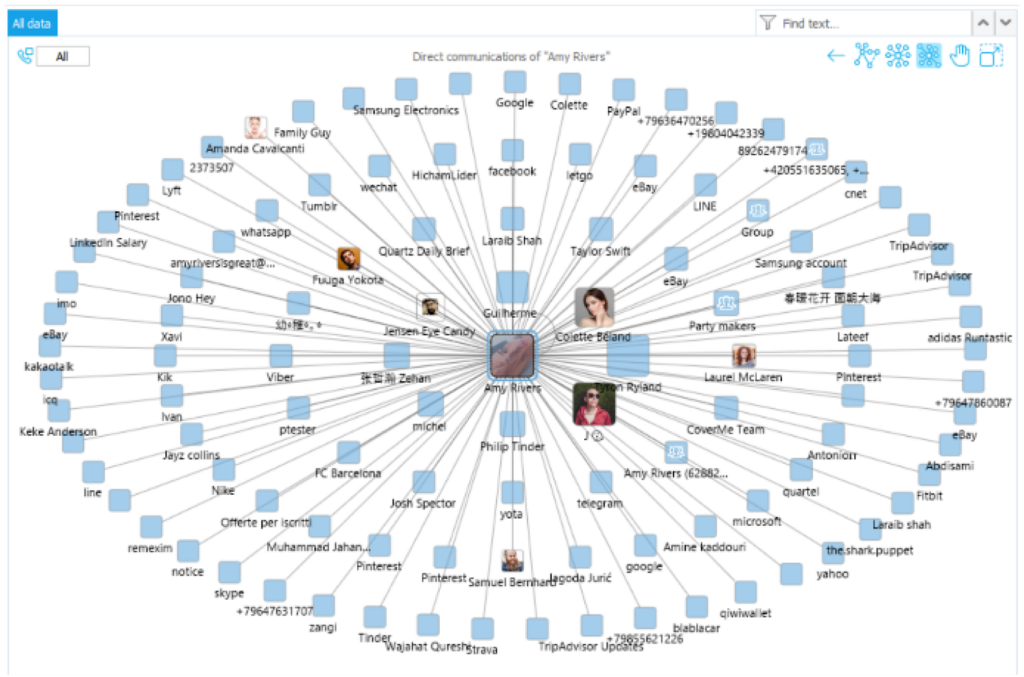
ii. cloud mode, in which contacts that are more frequently interacted with are displayed closer to the central account – click on the cloud distribution icon in the upper-right corner
The difference between the views:
b. common communications of several extractions by double-clicking the contact’s icon in the graph

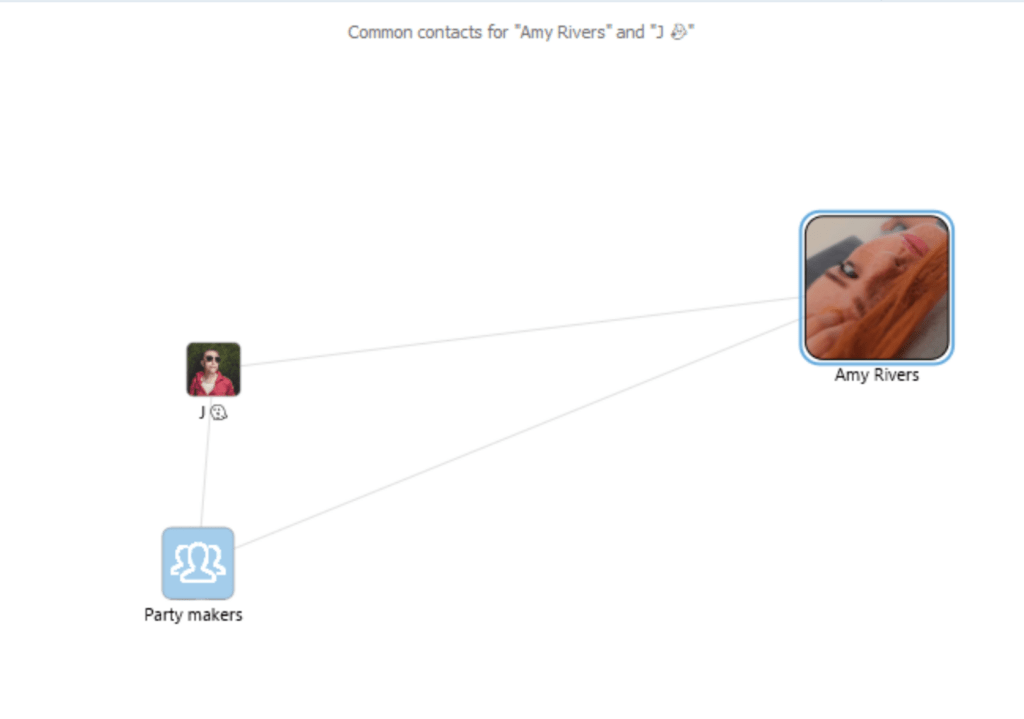
c. common contacts of the selected accounts – select the contacts of interest with a frame or hold Ctrl, and a button appears on the detail’s sidebar
3. View a contact’s entire communication history by choosing View/Comminutions option on the toolbar.
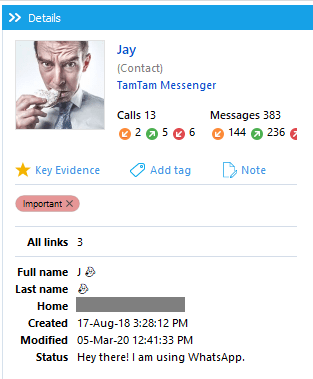
4. Add tags to data of interest and mark crucial information as Key Evidence. The tagged data will be available in the Key Evidence section. Additionally, the extraction Timeline can be filtered by tags for investigators to view their chosen set of data.
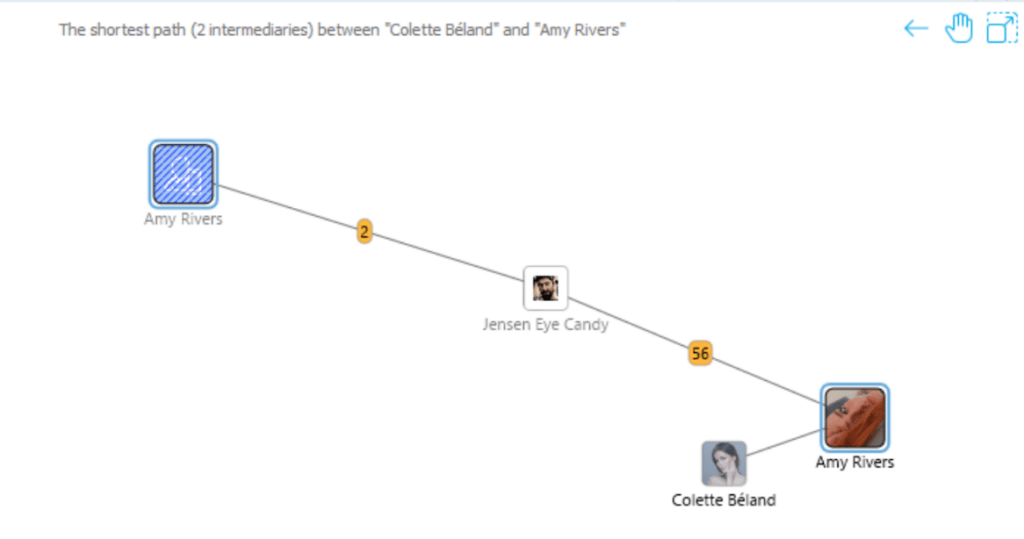
5. Define the shortest paths between selected contacts. The number of intermediaries is set to 5 by default, but this can be changed within the Settings.ini file in the Oxygen Forensic® Detective folder. Select the 2 contacts of interest with a frame or hold Ctrl, and a button appears on the details sidebar.
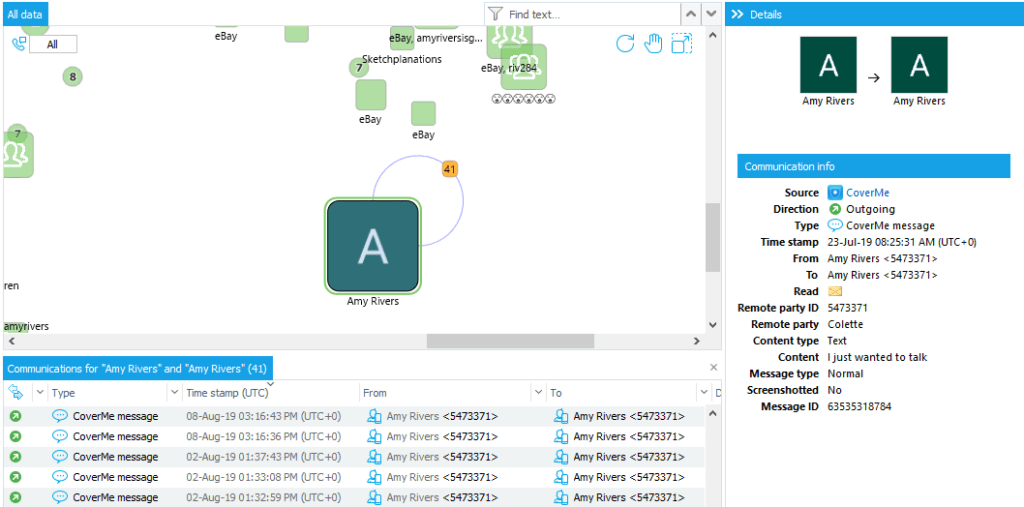
6. View interactions the primary contact had with themselves. Often times, a suspect will send critical information to themselves as to not forget it. Many valuable things can be found here. If there are any self-communications the contact will have a circle with the number of communications. Click on this number to view communications.
7. If you see many accounts of the same device owner on the Graph go to the Contacts section, manually select all these accounts there and press Merge button on the toolbar. After this you will see the merged account in the Social Graph as well.
8. Need to hide a contact from the Social Graph? Press Delete button or right click a contact and select Hide option in the menu. You can always reset filters by pressing Reset filters button on the toolbar.
9. Save a snapshot of a Social Graph in SVG file format by clicking Make snapshot button and export into a Relativity file by clicking Export button. The advantage of a vector graphic format (SVG) over a raster format is that the image quality remains almost the same when zoomed in.
10. Save the current state of the case graph, with user-configured filters, location of elements, and graph tabs by clicking the Save button on the toolbar. So if the section is closed or the program restarts, the Social Graph the investigator created will remain
Last, but not least, it’s completely free! The Social Graph is built into Oxygen Forensic® Detective, so you can take advantage of this tool at no additional charge!
We hope you find the Social Graph useful and have no problem navigating through it! Share your experience with us. The positive feedback keeps us moving and the negative helps us make our software even better!